


Looking to make brochures, event programs, or marketing booklets? Saddle Stitch Booklets are a great choice. They’re both timeless and cost-effective. We’ll guide you through making high-quality stitched booklets that will impress everyone.
Saddle stitching is a top choice for booklets, brochures, and magazines. It’s cheaper than other methods because it uses less materials and labor. Plus, these booklets open flat, making reading easy and enjoyable.
This article will cover the basics of saddle stitching and how to plan and design your booklets. We’ll also talk about preparing your files for printing, the printing process, and finishing touches. Whether you’re experienced or new to print, this guide will help you make beautiful stitched booklets that boost your brand.
Introduction to Saddle Stitched Booklets
Saddle stitching is a common way to bind booklets, brochures, and magazines. It folds paper sheets in half and staples them along the edge. This creates a spine that keeps the pages together. Saddle stitched booklets are great for many print projects because they’re versatile. Saddle stitch booklet printing is essential for high-quality booklet binding and finishing, ensuring professional results.
What is Saddle Stitching?
Saddle stitching is a simple and affordable way to make a booklet look professional. Sheets of paper are folded and stapled together along the spine with wire staples, creating printed pages that are easy to open and read.
Benefits of Saddle Stitched Booklets
- Cost-effectiveness: Saddle stitching is one of the most economical binding options, making it a popular choice for smaller print runs and budget-conscious projects.
- Quick turnaround: The saddle stitching process is relatively simple, allowing for faster production times compared to other binding methods.
- Flat opening: Saddle stitched booklets open flat, enabling the reader to view full spreads without any interruption at the spine.
- Versatility: Saddle stitching can accommodate a wide range of paper sizes, weights, and formats, making it suitable for a variety of print projects.
- Lightweight and compact: Saddle stitched booklets are generally lighter and more compact than other binding options, which can lead to lower shipping and distribution costs.
Saddle stitched booklets are popular for many reasons. They’re simple, affordable, and look professional. They’re great for brochures, magazines, instruction manuals, and promotional items. An extensive range of sizes, paper types, and combinations is available for saddle stitched booklets, offering a wide variety of choices for customers.
“Saddle stitching is a versatile and cost-effective binding method that allows for the creation of professional-looking booklets, brochures, and magazines.”
Planning Your Saddle Stitched Booklet

Before you start designing your saddle stitched booklet, make sure you have all your ducks in a row. First, figure out what your booklet is for – like a brochure, event program, or product catalogue. Knowing your goals will help you make the right design choices.
Defining Your Objectives
Start by setting clear objectives for your saddle stitched booklet. Think about what you want to achieve with it. Who will read it? What message do you want to share? Answering these questions will help you craft content and design that meets your goals.
Understanding Your Target Audience
Next, think about who will read your booklet. Tailor the content and design to their likes and needs. Consider their age, interests, and how they like to be communicated with. This way, your booklet will hit the mark and meet your objectives.
Organizing Your Content
Organise your content into clear sections and plan the layout. Keep the information short and engaging. Choose the right booklet size, as it affects the cost. Saddle stitching works well for booklets from 8 to 64 pages, fitting many needs.
Consider using blank pages on the inside covers to add extras and ensure proper binding.
When designing, stick to multiples of 4 in your page layout to avoid issues. High page counts can cause content near the spine to be too close or hidden. Adjusting the margins helps fix this problem.
With careful planning, you can make a saddle stitched booklet that looks professional and meets your goals. It will connect with your audience and deliver your message effectively.
Designing Your Saddle Stitched Booklet

When designing your saddle stitched booklet, it’s key to set up your design file right. Use professional software like Adobe InDesign or Illustrator for a smooth process. Start by picking the right page size and add a 3mm bleed around the edges to avoid white spaces after trimming.
Setting Up Your Design File
Put your content in the right page order. This includes the outside front cover, inside front cover, inside back cover, and outside back cover. Make sure your page count is a multiple of 4 for the saddle stitching process.
For hard cover options, the cover is printed on a heavier paper weight compared to the internal pages, offering many combinations of sizes and paper types.
Keep an eye on your layout, leaving enough margins and spacing. Use high-resolution images (300 DPI or higher) and set the colour mode to CMYK for printing. Embed fonts or convert them to outlines to keep your design looking as intended.
Page Order and Layout
It’s vital to grasp the concept of reader spreads and printer spreads when designing your booklet. Reader spreads show the pages in the order readers will see them. Printer spreads show the pages as they’ll print side-by-side on a sheet, which might not match the order you’re used to.
Most printers want you to send individual pages in the order they’ll appear in the final booklet. This approach gives more flexibility and optimizes production. Arranging pages before printing is called imposition, making sure they’re in the right order after folding, binding, and trimming.
“Saddle stitching is a fast turnaround, cost-effective binding method that requires less materials and less labor compared to perfect binding or wire binding.”
For saddle-stitched booklets with a thick cover, you can send the cover layout as a separate file or include it with the interior pages. When designing the cover, focus on the image and font. Choose elements that complement each other to convey your message well. Avoid using too many fonts, colours, and images.
Preparing Your Files for Print
Before you send your design to the printer, make sure your files are ready. This is key for getting top-notch results in your final stitched booklet. We’ll look at important things like image resolution, colour mode, font embedding, and text conversion.
Image Resolution and Colour Mode
For great print quality, all images should be at least 300 DPI (Dots Per Inch). This high resolution means your pictures will be sharp and clear, not pixelated or blurry. Also, use CMYK colour mode for printing, not RGB which is for screens.
Font Embedding and Text Conversion
To make sure your printed booklet looks right, embed all the fonts used in your design. Or, you can change your text to outlines to avoid font problems during printing.
Proper file preparation is the key to a successful print job. Pay close attention to image quality and font management to ensure your stitched booklet looks its absolute best.
By following these steps for preparing your files, you’re on track to make a high-quality stitched booklet. It will grab your audience’s attention and make a strong impact.
Stitched Booklet Printing Process
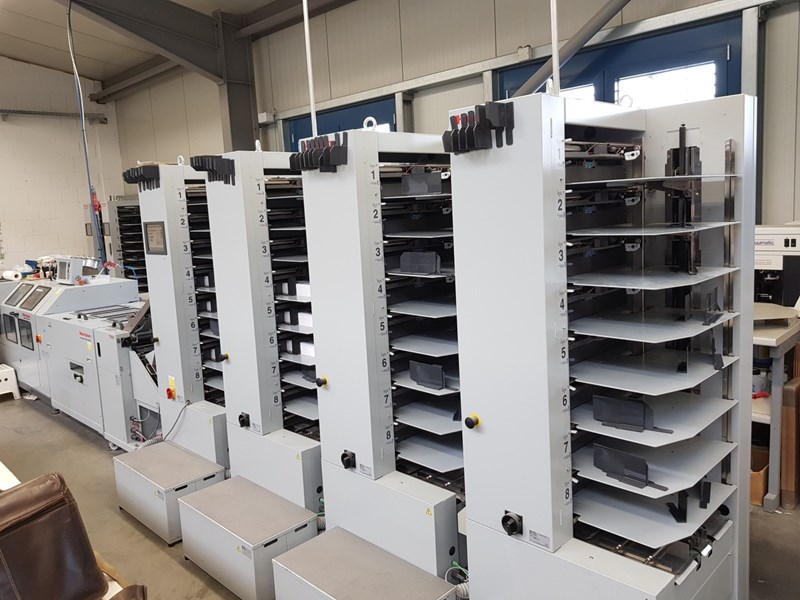
Making high-quality saddle stitch booklets is a detailed process. First, the printed sheets are put in the right order. This makes sure the pages connect smoothly.
After arranging, the sheets are folded in half to create the booklet’s pages. Then, they are stapled along the spine with wire staples. This method, called saddle stitching, is both popular and affordable.
This printing process works well for booklets with 8 to 76 pages. For small print jobs, hand-fed stitching is best because it’s quick to set up. But for big orders, high-speed saddle stitching saves money.
Saddle stitching is great because it’s budget-friendly. Using staples and simple folds cuts down on costs. This makes stitched booklets a top pick for many companies.
Also, this process is fast, often delivering the finished booklets in just one day. “Saddle stitching is an efficient and cost-effective printing process that delivers high-quality booklets in a timely manner.” Stitched booklets are good for many uses but have limits. For thicker booklets or more pages, other binding methods might be better. Perfect Binding, Coil, or wire o binding could be used instead.
Binding and Finishing Your Saddle Stitched Booklet
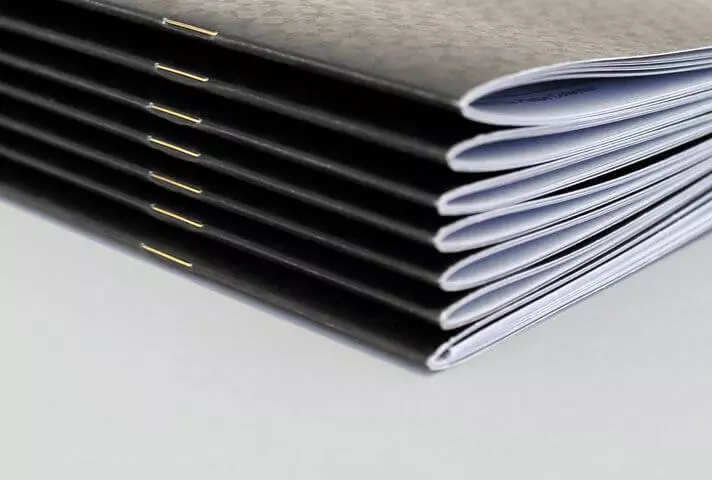
The binding and finishing of your saddle stitched booklet are key to a top-notch final product. After printing, the pages are folded carefully to get the booklet shape. Then, they are stitched along the spine with wire staples, a method called saddle stitching.
Folding and Stitching
The pages are folded in half to make the booklet’s pages. This makes sure the pages are lined up right for stitching. The sheets are then stapled together along the spine, making the saddle stitched binding. This way, the booklet can hold up to 200 pages, depending on the paper.
We also offer self cover options where the cover is printed on the same paper type and weight as the internal pages.
Trimming and Quality Checks
After stitching, the booklet gets trimmed for clean edges. This makes it look professional. Then, it goes through a quality check to make sure the colours are right, pages are in order, and the print is good. Only if it passes this check is it packed and sent out.
Getting the booklet bound and finished right is key to a quality product. From folding and stitching to trimming and checking quality, each step is important. They all work together to make a booklet that looks great and meets high standards.
Attention to detail in the binding and finishing process is what sets apart a professionally crafted saddle stitched booklet from a subpar one.
Cost-Effectiveness of Saddle Stitched Booklets
Saddle stitching is a budget-friendly way to bind books. It uses fewer materials and less work than perfect or wire binding. This makes it great for businesses watching their spending. Plus, its versatility makes it perfect for many uses like brochures and catalogs.
Industry stats show saddle stitch is best for small booklets and magazines. It works well with page counts that end in four. This method is cheaper than perfect or spiral binding.
Saddle stitching is flexible, handling page counts from 8 to 72. This lets businesses create exactly what they need without spending more. Using the same paper for covers and pages also cuts costs.
“Saddle stitch binding often proves to be a more cost-effective option compared to perfect binding due to requiring fewer materials and less labor.
Upgrading to new bindery gear can make saddle stitching even more efficient. It cuts down on labor costs and speeds up production. This means businesses save money and work faster.
So, saddle stitched booklets are a smart choice for those wanting to save money. They’re versatile, simple, and still look professional. This makes them ideal for businesses on a budget.
Quick Turnaround Time for Saddle Stitched Booklets
Time is crucial for printed materials. Saddle-stitched booklets have a big advantage – they’re quick. The process includes collating, folding, stapling, and trimming, making them fast to produce.
This speed is great for urgent needs like events, promotions, or last-minute prints. Para Print in Adelaide offers Same Day, Next Day, and 2 Business Day fast printing for saddle-stitched booklets.
Standard sizes for these booklets are A5 Landscape and Portrait, with A4 in Portrait only. But, if you need something special, they also offer A7, A6, and Square sizes.
Make your booklets look great with cover finishes like Gloss, Matt, or Soft Touch Velvet. You can also add foil in colours like Gold, Silver, Copper, Red, Blue, Pink, or Green with the velvet option.
For something unique, Para Print has die-cut or die-less cut covers. These can match your design perfectly. They’re priced based on your needs, so your booklet will stand out.
“Saddle-stitched booklets offer a fast and efficient printing solution, making them ideal for projects with tight deadlines.
Para Print also offers design help for a smooth process. They can update your files or create a new design. If you’re in a rush, they have emergency upgrades to speed things up.
Page Count Limitations for Stitched Booklets
Saddle stitching is a common way to bind booklets, but it has limits on the page count it can handle. Booklets with 8 to 76 pages work best with this method. As the page count goes up, the booklet gets thicker and harder to keep flat and readable. This can cause wear and tear on the binding over time.
The highest page count for a saddle-stitched booklet is about 120 pages. But, it’s best to keep the page count under 60 pages for the best look and function. Going over 60 pages might mean looking into alternative binding methods with your printer.
The smallest page count for saddle stitch binding is 4 to 8 pages, depending on the type of booklet. The page count must always be a multiple of four, like 16, 28, or 52 pages.
“To ensure a clean and professional final appearance, it is suggested not to exceed 60 pages, especially if using thick paper.”
Saddle stitch is best for booklets with fewer pages, usually 8 to 64 pages. Using thick papers in saddle stitch can make the booklet too bulky for more pages.
Adding more pages to a saddle-stitched booklet makes it thicker. This can affect how it looks along the spine. Using high-quality, light-weight paper helps keep the print clear for more pages.
It’s key to keep the page count within the suggested range for a readable, long-lasting, and professional-looking booklet. If you need more pages, think about using alternative binding methods like perfect binding, coil binding, or wire-o binding.
Stitched Booklet Binding Alternatives
If your project needs more pages or a stronger look, there are other binding options. Perfect binding, coil binding, and wire-o binding work well for thicker booklets. They let you add more content without making it hard to read and are more durable.
Perfect binding, also known as adhesive binding, makes a square spine. It’s often used for softcover books, magazines, and catalogues. This method uses a strong PUR adhesive. It’s 50% stronger than EVA glue, so the pages open wide without glue cracking.
Coil or spiral binding is flexible and lets you choose from various plastic coil colours. It allows books to open all the way, which is great for reference materials.
- Wiro or wire-o binding is another top choice, offering a clean, strong finish. It uses metal loops to hold the pages together, keeping the book solid when open.
- For projects needing many pages or a bigger look, these alternatives are perfect. They go beyond what saddle stitching can do.
The right binding method depends on your project’s needs, like page count, look, and use. By trying these alternatives, you can make sure your booklet looks great and meets your audience’s expectations.
Conclusion
Making high-quality stitched booklets is a rewarding and cost-effective way to share your message or promote your business. Plan your goals, design with care, and work with a trusted printing service. This way, you can turn your ideas into a professionally polished product. Saddle stitching is a timeless and handy way to share your content, making it easy and interesting for your audience.
For brochures, event programs, or any other bound materials, this guide will show you how to make the high-quality stitched booklets you want. These booklets are versatile, letting you pick from different paper types, finishes, and sizes. Their sleek look and easy opening will make a strong impression on your readers.
Using saddle stitching, you can make a cost-effective and timeless print that clearly shares your message and grabs your audience’s attention. Add design elements like images and fonts to make your booklets more appealing and strengthen your brand’s professional look.
FAQ
What is saddle stitching?
Saddle stitching is a way to bind booklets, brochures, and magazines together. It folds the paper sheets in half and staples them along the edge. This creates a spine that keeps the pages together.
What are the benefits of saddle stitched booklets?
Saddle stitched booklets are cost-effective and look professional. They open flat and are quick to make. This makes them great for many print projects.
How do I plan my saddle stitched booklet?
Start by setting clear goals and knowing who your audience is. Organize your content well. Pick the right size for your booklet, and select quality stock for your inner pages and to have your cover printed on.
How do I design my saddle stitched booklet?
Use professional design software for your booklet (and for all bound booklets). Make sure your document is the right size and includes a 3mm bleed. Arrange your content correctly and make sure it has an even number of pages for stitching.
How do I prepare my files for printing?
Make sure all images are at least 300 DPI and in CMYK color mode. Include all fonts in your design or convert them to outlines.
What is the stitched booklet printing process?
First, collate the printed sheets in the right order. Then, fold and staple the sheets along the spine. Finally, trim the booklet to size.
How is the binding and finishing process for saddle stitched booklets?
Fold the pages in half carefully. Staple the sheets along the spine with wire staples. Trim the booklet to size for a professional finish.
What are the cost-effectiveness benefits of saddle stitched booklets?
Saddle stitching is cheaper than other methods like perfect or wire binding. It uses fewer materials and less labor, making it good for budgets.
What is the turnaround time for saddle stitched booklets?
Making saddle stitched booklets is quick because of the simple process. This means you get your materials fast, which is great for urgent projects.
What are the limitations of saddle stitched booklets?
Saddle stitching works best for 8 to 76 pages. More pages can make the booklet thick and hard to open. For more pages, consider perfect, coil, or wire-o binding.
What are the alternative binding options for booklets?
For more pages or a bigger look, try perfect, coil, or wire-o binding. These options are better for readability and durability than saddle stitching.